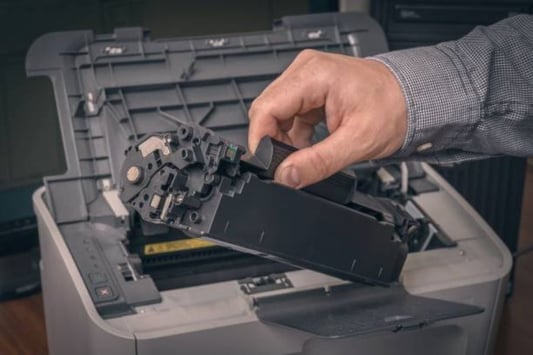
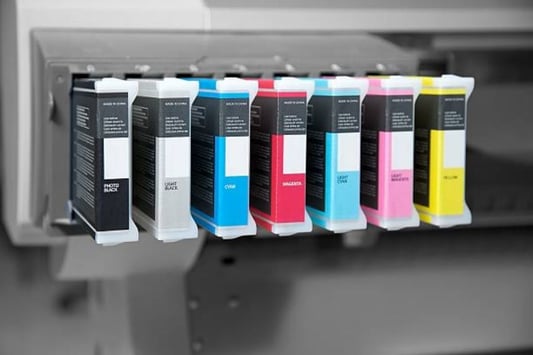
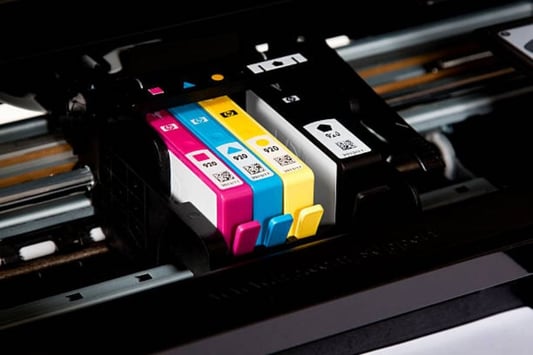
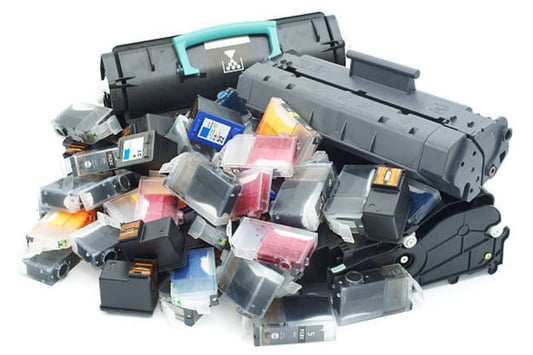
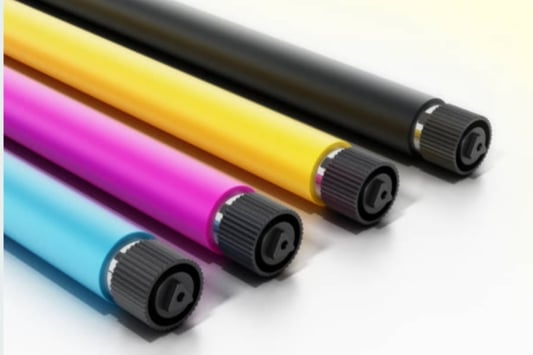
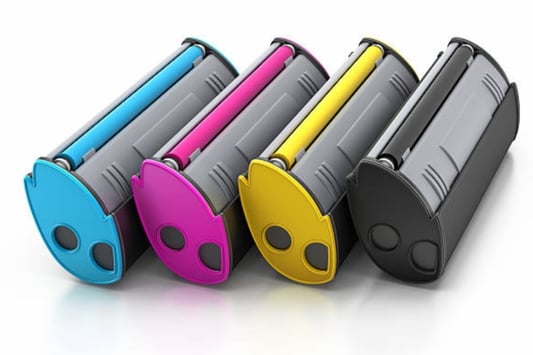
Everything You Need to Know About DR 2425 Toner
Introduction:Printing is an integral part of office life, and it's crucial to have the right toner for your printer. dr 2425 toner is one of the most reliable and popular toners available in the market today. In this article, we'll explore everything you need to know about DR 2425 Toner.What is DR 2425 Toner?DR 2425 Toner is a high-quality toner that is compatible with printers that use the Brother TN 2425 toner. It is a high-yield toner and can print up to 2600 pages of A4 paper at 5% coverage. The toner is designed to produce sharp and clear text and graphics, making it an ideal choice for printing high-quality documents without compromising on quality.Compatibility:DR 2425 Toner is compatible with a range of Brother printers, including the DCP-L2550DW, MFC-L2710DW, MFC-L2750DW, HL-L2310D, HL-L2350DW, HL-L2375DW, and many more. Ensure that you check your printer's compatibility before buying the toner to get the best results.Quality:DR 2425 Toner delivers high-quality printouts with sharp and clear text and graphics, making it perfect for printing professional documents. It is also equipped with anti-smudging and anti-fading technology to ensure that documents retain their quality over time.Capacity:DR 2425 Toner is a high-yield toner, which means it can print up to 2600 pages of A4 paper at 5% coverage. The high capacity makes it an ideal choice for offices with a high print volume as it reduces the frequency of replacing toners and cuts down costs.Installation:DR 2425 Toner is easy to install, and one can simply follow the manufacturer's instructions to get it up and running in no time. Ensure that the toner is compatible with your printer before setting it up, and handle it with care to prevent any damage.Affordability:DR 2425 Toner is a reasonably priced toner that provides excellent value for money. It is more affordable than similar toners in the market, making it a cost-effective solution for businesses and offices that need to print high volumes of documents regularly.Sustainability:DR 2425 Toner is an environment-friendly toner that complies with recycling standards. The toner cartridge is easy to recycle, and the manufacturer provides instructions on how to recycle it properly, minimizing the impact on the environment.Warranty:DR 2425 Toner comes with a warranty period that guarantees the toner's performance and quality. The warranty ensures that the toner is free from defects and will perform as expected, giving you peace of mind.Maintenance:Maintaining DR 2425 Toner is easy, and one can follow the manufacturer's instructions to keep the toner in good condition. Ensure that the toner is stored in a cool and dry place, away from direct sunlight, and the printer is cleaned regularly to maintain its optimal performance.Conclusion:DR 2425 Toner is a reliable and high-quality toner that delivers excellent value for money. It is compatible with a range of Brother printers, easy to install and maintain, and comes with a warranty period, giving you peace of mind. Make sure to choose a reputable seller and check your printer's compatibility before buying DR 2425 Toner to get the best results.Quote InquiryContact Us
READ MORE
The Brother HL 2240 Drum: A Comprehensive Guide
What is the brother hl 2240 drum?The Brother HL 2240 drum is an essential component of the Brother HL 2240 printer. The drum is responsible for transferring toner onto the paper during printing. Over time, the drum will wear out and need to be replaced.When Should I Replace the Drum?The Brother HL 2240 drum has a lifespan of approximately 12,000 pages. However, this number can vary depending on the type of printing being done. Some signs that it may be time to replace the drum include faded or blotchy prints, streaks on the paper, or the printer indicating that the drum needs to be replaced.How Do I Replace the Drum?To replace the Brother HL 2240 drum, first, open the front cover of the printer. Then, gently pull out the drum and toner assembly. Next, press down on the green lock lever located on the left side of the assembly and slide the toner cartridge out. Once the toner cartridge is removed, you can easily replace the drum. Finally, slide the toner cartridge back in, lock it in place, and insert the assembly back into the printer.What Should I Look for When Purchasing a Replacement Drum?When purchasing a replacement Brother HL 2240 drum, it is important to ensure that it is compatible with your specific printer model. Additionally, you should look for a reputable manufacturer that produces high-quality, OEM-equivalent drums.How Much Does a Replacement Drum Cost?The cost of a replacement Brother HL 2240 drum can vary depending on the manufacturer and where it is purchased. On average, a replacement drum can cost anywhere from $40 to $100.Can I Extend the Lifespan of My Drum?To extend the lifespan of your Brother HL 2240 drum, there are a few things you can do. First, try to avoid printing in high-temperature or high-humidity environments, as this can cause the drum to wear out more quickly. Additionally, always use high-quality toner cartridges and avoid using damaged or low-quality paper.Are There Any Compatible Drums Available?Yes, there are compatible Brother HL 2240 drums available. However, it is important to ensure that the compatible drum you purchase is of high quality and will not damage your printer.How Do I Know if the Drum Needs to be Cleaned?If you notice spots or blotches on your prints, this may indicate that the Brother HL 2240 drum needs to be cleaned. To clean the drum, open the front cover of the printer, remove the drum and toner assembly, and gently wipe the surface of the drum with a soft, lint-free cloth.What Happens if I Don't Replace the Drum?If you continue to use a worn-out Brother HL 2240 drum, it will eventually fail completely, leading to poor print quality and possibly even damage to your printer.ConclusionThe Brother HL 2240 drum is an essential component of the Brother HL 2240 printer. When it comes time to replace the drum, be sure to purchase a high-quality, compatible drum that is compatible with your specific printer model. Additionally, take steps to extend the lifespan of your drum, including avoiding high-temperature or high-humidity environments and using high-quality toner cartridges and paper.Quote InquiryContact Us
READ MORE
Samsung C480FW Imaging Unit: The Key to High-Quality Printing
The Importance of the samsung c480fw imaging unitIf you own a Samsung C480FW laser printer, you know that it's a reliable device that can handle all your printing needs. However, to ensure that your printer always produces sharp and clear images, you will need to replace the imaging unit when it wears out. In this article, we will explore what the Samsung C480FW imaging unit is and the role it plays in producing high-quality prints.What is the Samsung C480FW Imaging Unit?The imaging unit is a critical component of any laser printing device, including the Samsung C480FW. It's responsible for transferring the toner powder onto the paper during the printing process. The Samsung C480FW imaging unit contains a photosensitive drum, which is coated with a light-sensitive material that attracts toner in specific areas to form an image. When the toner sticks to the drum, the laser printer produces a printed image.How Does the Imaging Unit Affect the Quality of Prints?The quality of a printed image is directly proportional to the condition of the imaging unit. As the drum ages, it tends to develop wear and tear that can affect the toner's ability to stick uniformly. Consequently, you may end up with blotchy, faded, and incomplete prints. Besides, a worn-out imaging unit can also cause paper jams, which can damage the drum unit and the fuser assembly.When Should You Replace the Imaging Unit?The lifespan of the Samsung C480FW imaging unit depends on various factors, such as the frequency of use and the type of toner used. However, as a general rule, you should replace the imaging unit after it has printed around 30,000 pages. You may also need to replace the imaging unit earlier if you notice that your prints have become smudged, uneven, or faded.How to Replace the Imaging Unit on Samsung C480FWReplacing the imaging unit on Samsung C480FW is a simple process that anyone can do. All you need to do is open the front cover, remove the toner cartridges, remove the old imaging unit, and insert the new one. Once you have installed the new imaging unit, you can replace the toner cartridges and close the front cover. Your printer will automatically detect the new imaging unit and reset the page counter.Where to Buy a Samsung C480FW Imaging UnitIf you need to replace the imaging unit on your Samsung C480FW laser printer, you can purchase one from authorized Samsung dealers or online stores. However, to ensure that you get a genuine imaging unit, you should buy it from reputable dealers such as Amazon, Best Buy, or Staples. Also, be wary of cheap knockoffs that can damage your printer and produce poor-quality prints.The Cost of a Samsung C480FW Imaging UnitThe cost of a Samsung C480FW imaging unit can vary depending on the supplier. However, on average, you can expect to pay between $80 and $120 for a genuine imaging unit. Although this may seem expensive, it's a worthwhile investment as it will ensure that you get high-quality prints and prolong the lifespan of your laser printer.How to Extend the Life of Your Imaging UnitTo extend the lifespan of your Samsung C480FW imaging unit, you need to take proper care of it. One way of doing this is by cleaning the drum regularly to remove any toner residue. You can do this by gently wiping the drum with a clean, dry cloth. Another way is by using quality toner cartridges that are compatible with your printer. Cheap or low-quality toner cartridges can damage the imaging unit and cause it to wear out faster.Final ThoughtsThe Samsung C480FW imaging unit is a critical component of any laser printer as it determines the quality of prints that the printer produces. By replacing the imaging unit at the right time and taking proper care of it, you can ensure that your printer produces high-quality prints consistently.Quote InquiryContact Us
READ MORE
The Comprehensive Guide to Brother DR 2325 Toner
IntroductionIf you own a Brother printer that uses DR 2325 toner, there are a few things you should know about this toner cartridge. In this article, we will explore everything you need to know about brother dr 2325 toner, including what it is, how it works, and how to use it.What is Brother DR 2325 Toner?Brother DR 2325 toner is a toner cartridge designed for use in Brother printers. This cartridge is specifically designed to work with Brother printers that use laser printing technology.How Does Brother DR 2325 Toner Work?Brother DR 2325 toner works by using a combination of toner and heat to fuse the toner particles onto the page. When you print a document, the printer applies an electrostatic charge to the drum inside the toner cartridge. The charged drum attracts the toner particles to the drum, and the heat from the printer then fuses the toner particles onto the page.How to Use Brother DR 2325 TonerTo use Brother DR 2325 toner, you will need to install the toner cartridge into your Brother printer. The process for installing the toner cartridge may vary depending on the model of your printer. Consult your printer's user manual for specific instructions on how to install the cartridge. Once the cartridge is installed, you can start printing as you normally would.How Long Does Brother DR 2325 Toner Last?The lifespan of a Brother DR 2325 toner cartridge will vary depending on how frequently you use your printer. On average, the cartridge can print around 2,600 pages before needing to be replaced. However, this number can vary based on factors such as the amount of ink you use per page and the types of documents you are printing.How to Replace Brother DR 2325 TonerWhen your Brother DR 2325 toner cartridge runs out of ink, you will need to replace it in order to continue printing. To replace the cartridge, start by opening the printer's front cover. Then, gently pull the old toner cartridge out of the printer and set it aside. Next, remove the new toner cartridge from its packaging and gently shake it from side to side to distribute the toner inside. Finally, insert the new cartridge into the printer and close the front cover.Where to Buy Brother DR 2325 TonerIf you need to purchase a new Brother DR 2325 toner cartridge, there are several places you can buy it. Many office supply stores carry Brother toner cartridges, as do online retailers such as Amazon and Staples. Additionally, you can buy the cartridges directly from the Brother website.How to Store Brother DR 2325 TonerIf you need to store a Brother DR 2325 toner cartridge for any length of time, there are a few best practices to follow to ensure that the cartridge remains in good condition. First, store the cartridge in a cool, dry place away from direct sunlight. Second, keep the cartridge in its original packaging until you are ready to use it. Finally, avoid exposing the cartridge to extreme temperatures or humidity.How to Recycle Brother DR 2325 TonerAfter your Brother DR 2325 toner cartridge has run out of ink, it is important to dispose of it properly. One option is to recycle the cartridge. Brother offers a toner cartridge collection and recycling program, which allows you to send your used cartridges back to the company for recycling.ConclusionBrother DR 2325 toner is an essential component of any Brother laser printer. By understanding how the cartridge works, how to use it, and how to care for it, you can ensure that your printer continues to produce high-quality prints for years to come.Quote InquiryContact Us
READ MORE
Brother HL-L2320D Drum: What You Need to Know
A Quick Introduction to Brother HL-L2320D DrumThe Brother HL-L2320D is a monochrome laser printer that is best known for its fast printing speeds and high-quality outputs. It comes with a built-in drum unit that is designed to last for a long time, but you will eventually need to replace it. In this article, we will discuss everything you need to know about Brother HL-L2320D drum replacement.What is a Drum Unit?The drum unit is an essential component of a laser printer. It is responsible for creating the electrostatic image that is transferred to paper during the printing process. A drum unit consists of a drum and a toner cartridge, and it is typically located inside the printer.When Do You Need to Replace the Drum Unit?The Brother HL-L2320D drum unit has an estimated lifespan of about 12,000 pages. However, this number can vary depending on the intensity of your printing. You will know it is time to replace your drum unit when you start to notice signs of wear and tear, such as poor print quality or ghosting.How to Replace the Drum Unit?Replacing the drum unit on a Brother HL-L2320D is a straightforward process. Start by turning off the printer and unplugging it from the power source. Open the front cover and remove the toner cartridge. Next, slide the green tab on the drum unit to the left and lift it out of the printer. Finally, insert the new drum unit and reset the printer's drum counter.How Often Should You Replace the Drum Unit?It is recommended that you replace the drum unit on your Brother HL-L2320D every 3-4 toner cartridge replacements, or when print quality starts to degrade. Keeping a spare drum unit on hand can be useful, especially if you do a lot of printing.What Should You Consider When Buying a New Drum Unit?When buying a new drum unit for your Brother HL-L2320D printer, there are a few things you need to consider. First, make sure to buy a drum unit that is compatible with your printer model. You should also check the estimated page yield and the manufacturer's warranty before making a purchase.Can You Refill a Brother HL-L2320D Drum Unit?While it is possible to refill a Brother HL-L2320D drum unit, it is not recommended. Refilling a drum unit can damage the printer and lower the print quality. Additionally, refilled drum units may not last as long as new ones.How to Extend the Life of Your Drum Unit?To extend the life of your Brother HL-L2320D drum unit, make sure to keep the printer in a cool and dry place. Avoid exposing the drum unit to direct sunlight or high temperatures. Also, try to print only when necessary and use the printer's eco-mode feature to save toner.What to Do with the Old Drum Unit?When you replace the drum unit on your Brother HL-L2320D, you should recycle the old one. You can usually recycle the drum unit at a local office supply store or electronic recycling center. Some manufacturers also offer recycling programs for their drum units.ConclusionReplacing the drum unit on your Brother HL-L2320D printer is an important maintenance task that will ensure the continued high-quality performance of your printer. By following the steps outlined in this article and considering the factors discussed, you can make an informed decision when buying a new drum unit for your printer.Quote InquiryContact Us
READ MORE
Brother HL 2280DW Drum: All You Need to Know
brother hl 2280dw drum: All You Need to KnowIf you own a Brother HL 2280DW printer, then you know that the drum unit is one of the key components of this machine. It is responsible for transferring the toner onto the paper during the printing process, and if it fails or starts to wear out, the quality of the printed documents will be affected.What Is a Drum Unit?A drum unit is a component of the printer that is responsible for transferring the toner onto the paper during the printing process. It is made up of a metal or plastic cylinder that is coated with a photoconductive material. When the laser scans the drum, it creates an electrostatic charge that attracts the toner particles to the page.When Should You Replace Your Drum Unit?A Brother HL 2280DW drum unit typically lasts for around 12,000 pages, although this can vary depending on how often you use your printer and the type of documents you are printing. When the drum unit starts to wear out, you may notice that the print quality is not as sharp as it used to be, or that there are streaks or smudges on the page.How to Replace Your Drum UnitReplacing the drum unit on your Brother HL 2280DW printer is a relatively easy process. First, turn off the printer and unplug it from the wall. Then, open the front cover and remove the toner cartridge. Next, you will see the drum unit. To remove it, simply grab the handle and pull it out. Insert the new drum unit and reinsert the toner cartridge. Close the front cover and turn on your printer.Where to Buy a Replacement Drum UnitIf you need to replace the drum unit for your Brother HL 2280DW printer, you can find it at most office supply stores or online. Make sure to buy a drum unit that is compatible with your specific printer model.How to Extend the Life of Your Drum UnitTo get the most out of your Brother HL 2280DW drum unit, there are a few things you can do to extend its life. First, try to avoid printing large documents or graphics-heavy files, as these can put a lot of strain on the drum. Additionally, always use high-quality toner cartridges that are designed to work with your printer model. Finally, make sure to keep your printer clean and well-maintained, as dust and debris can cause damage to the drum unit over time.Common Issues with Drum UnitsThere are a few common issues that can arise with Brother HL 2280DW drum units. One is that the drum may wear out or become damaged, causing streaks or smudges on the printed page. Another issue is that the drum may become dirty or dusty, which can lead to reduced print quality. Finally, some users may experience issues with the drum not being recognized by the printer, which can be caused by a faulty drum or improper installation.ConclusionThe Brother HL 2280DW drum unit is an essential component of this printer model, and it is important to understand how it works and how to properly maintain it. By following the tips outlined in this article, you can ensure that your drum unit lasts for as long as possible and that your printed documents always look sharp and professional.Quote InquiryContact Us
READ MORE
Choosing the Best Drum for Brother DCP L2550DW
The Importance of Drum in PrintingWhen it comes to printing, one of the most important parts of your printer is the drum. The drum is responsible for transferring the toner from the cartridge to the paper, creating the actual image you see on your printed page. Without a functioning drum, your printer will not be able to produce good quality prints. What is Brother DCP L2550DW?Brother DCP L2550DW is a laser printer that is well known for its reliability and high-quality printing. This printer is perfect for small businesses and home offices that require good quality printing at an affordable price. It is an all-in-one printer that can scan, copy, and print documents.Why You Need a drum for brother dcp l2550dwIf you own a Brother DCP L2550DW printer, it is important to have a functioning drum. Over time, the drum will wear out and need to be replaced. Having a faulty drum can result in poor quality printing and even damage to your printer. Therefore, replacing the drum regularly will ensure that your printer continues to operate at its best. Choosing the Best Drum for Brother DCP L2550DWThere are many different types of drums available for Brother DCP L2550DW printers, and choosing the best one can be overwhelming. When choosing a drum for your printer, there are a few things to consider:CompatibilityIt is important to choose a drum that is compatible with your printer model. Using an incompatible drum can damage your printer and result in poor quality prints. Make sure to check your printer's manual to see which drum is compatible with your printer.Print YieldThe print yield of a drum refers to the number of pages it can print before needing to be replaced. Choosing a drum with a high print yield can save you money in the long run. The Brother DCP L2550DW printer is compatible with high-yield and standard-yield drums.BrandWhen it comes to printer supplies, it is important to choose a reputable brand. Brother is a well-known brand that produces high-quality printer supplies, including drums. Choosing a Brother drum will ensure that you get the best quality printouts from your printer.Replacing the Drum for Brother DCP L2550DWReplacing the drum for Brother DCP L2550DW is a straightforward process that can be done in a few simple steps:Step 1: Open the Printer CoverTo access the drum, open the printer cover. The drum is located inside the printer, underneath the toner cartridge.Step 2: Remove the Toner CartridgeRemove the toner cartridge from the printer by gently pulling it out.Step 3: Remove the Old DrumOnce the toner cartridge is removed, you will have access to the old drum. Gently pull the drum out of the printer.Step 4: Install the New DrumTake the new drum out of its packaging and slide it into the printer in the same location where the old drum was.Step 5: Reinstall the Toner CartridgeOnce the new drum is in place, reinstall the toner cartridge by sliding it back into place.Step 6: Close the Printer CoverFinally, close the printer cover to complete the process.ConclusionChoosing the right drum for your Brother DCP L2550DW printer is important to ensure the longevity and optimal performance of your printer. By considering compatibility, print yield, and brand, you can choose the best drum for your specific needs. Replacing the drum regularly will also ensure that your printer continues to produce high-quality printouts.Quote InquiryContact Us
READ MORE
How to Properly Install and Replace a Developer Unit in Your Printer
How to Properly Install and Replace a Developer Unit in Your PrinterIntroduction:Printers are essential devices for both personal and professional use. To ensure the longevity and smooth functioning of your printer, it is important to properly install and replace various components when needed. One such crucial component is the developer unit. In this article, we will guide you through the step-by-step process of installing and replacing a developer unit in your printer.1. Understanding the Developer Unit:The developer unit plays a vital role in the printing process. It is responsible for transferring toner onto the paper, creating the final image or text. Before diving into the installation and replacement process, it is important to understand the structure and function of the developer unit. This knowledge will help you handle it with care and ensure its proper functioning.2. Gather the Necessary Tools:Before you begin the installation or replacement process, gather all the necessary tools. This will save you time and ensure a smooth workflow. Some common tools you may need include a screwdriver, lint-free cloth, and a replacement developer unit compatible with your printer model. Check the user manual or manufacturer's website for specific details regarding the tools required for your printer model.3. Turn Off and Unplug the Printer:Prior to any maintenance work on your printer, it is crucial to turn it off and unplug it from the power source. This ensures your safety and prevents any electrical mishaps. Never attempt to install or replace a developer unit while the printer is still powered on.4. Access the Developer Unit:Locate the developer unit in your printer. It is typically found near the toner cartridge. Refer to the user manual or manufacturer's website if you are unsure about the exact location. Once located, carefully open the printer's access panel to gain access to the developer unit. Take note of any specific instructions provided by the manufacturer.5. Remove the Old Developer Unit:With the access panel open, identify the old developer unit. Using a screwdriver if necessary, carefully remove any screws holding the developer unit in place. Gently disconnect any cables or connectors attached to the unit. Take your time to avoid damaging any components.6. Clean the Printer:Before installing the new developer unit, it is a good practice to clean the printer. Use a lint-free cloth to remove any toner or debris that may have accumulated in the area. This ensures proper functioning and prevents any contamination that may affect print quality.7. Install the New Developer Unit:Take the replacement developer unit compatible with your printer model and align it properly with the designated slots. Slide it in gently until it fits securely into place. Make sure it is firmly attached and there are no loose connections. Refer to the user manual or manufacturer's website for any specific installation instructions.8. Reassemble the Printer:Once the new developer unit is securely installed, reassemble the printer by reversing the steps you followed to disassemble it. Connect any cables or connectors that were detached and ensure all screws are tightened securely. Close the access panel and make sure it is properly latched.9. Power On the Printer and Test:After completing the installation or replacement process, plug in the printer and turn it on. Allow the printer to go through its initialization process. Print a test page to ensure the developer unit is functioning correctly. If any issues arise, refer back to the user manual or seek assistance from the manufacturer's support team.10. Regular Maintenance and Replacement:Proper maintenance of your printer, including routine cleaning and replacement of components like the developer unit, is essential for optimal performance. Develop a schedule for regular maintenance and keep track of the recommended replacement intervals for each component. This will help prolong the lifespan of your printer and ensure high-quality prints.installing developer unit, replacing developer unit, printer maintenance, printer components, printer troubleshooting, printer repair, printer performance, developer unit function, printer installation, printer replacement How to Install and Replace a Developer Unit in Your Printer Learn how to properly install and replace a developer unit in your printer to ensure optimal performance and high-quality prints. Follow our step-by-step guide for a smooth and hassle-free process.Quote InquiryContact us!
READ MORE
Developer Unit vs. Imaging Drum: Which is the Better Investment?
Developer Unit vs. Imaging Drum: Which is the Better Investment?When it comes to choosing the right components for your office printer, there are many factors to consider. Two essential parts that often require replacement are the developer unit and the imaging drum. These components play a crucial role in the printing process, but which one is the better investment? In this article, we will explore the differences between the developer unit and imaging drum, their functions, longevity, and cost-effectiveness. By the end, you will have a better understanding of which option suits your needs.The Developer Unit: Enhancing Print QualityThe developer unit is an integral part of the laser printing process. Its main function is to transfer toner onto the imaging drum, ensuring high-quality prints. The developer unit consists of a magnetic roller that carries a charge opposite to that of the toner particles. As the toner passes through the developer unit, it adheres to the roller, creating a layer of toner particles that will be transferred to the imaging drum.Investing in a high-quality developer unit can significantly impact your print quality. A well-maintained and properly functioning developer unit will ensure consistent and sharp prints, free from streaks or blurriness. This makes the developer unit an excellent investment for businesses that prioritize professional-looking documents.The Imaging Drum: Transferring Toner to PaperThe imaging drum, also known as the photoreceptor drum, is responsible for transferring the toner particles from the developer unit to the paper. It is a light-sensitive drum that receives an electrostatic charge from a laser beam, creating a latent image that represents the content to be printed. The toner particles adhere to this charged image, ultimately transferring onto the paper during the printing process.Similar to the developer unit, the imaging drum's quality directly affects the output. A well-maintained imaging drum will result in clear and accurate prints, while a worn-out or damaged drum may lead to faded or inconsistent printouts. Therefore, investing in a reliable imaging drum is vital for businesses that prioritize print accuracy.Longevity and MaintenanceOne crucial aspect to consider when comparing the developer unit and imaging drum is their longevity and maintenance requirements. The average lifespan of a developer unit varies depending on usage and printer model. However, developer units typically last longer than imaging drums. With proper maintenance and regular cleaning, a developer unit can often outlast several imaging drum replacements.On the other hand, imaging drums have a limited lifespan due to their exposure to light and constant wear during the printing process. The frequency of replacement depends on factors such as print volume and the type of documents being printed. In general, imaging drums require more frequent replacement compared to developer units.Both the developer unit and imaging drum require regular maintenance to ensure optimal performance. Cleaning the units and replacing worn-out parts when necessary can prolong their lifespan and maintain print quality. It is essential to follow the manufacturer's guidelines for maintenance and replacement intervals to avoid any potential damage to the printer.Cost-Effectiveness: Developer Unit vs. Imaging DrumWhen it comes to cost-effectiveness, the developer unit often has an advantage over the imaging drum. While the initial investment for a developer unit may be higher, its longer lifespan means fewer replacements are needed. This can result in long-term cost savings for businesses that rely heavily on printing.On the other hand, imaging drums generally require more frequent replacements, increasing their overall cost. Depending on the printer model and usage, businesses may find themselves replacing the imaging drum multiple times throughout the lifespan of a single developer unit. It's essential to consider the ongoing maintenance and replacement costs when evaluating the cost-effectiveness of these components.Choosing the Right Investment for Your BusinessWhen deciding between the developer unit and imaging drum, it ultimately comes down to your specific needs and priorities. If print quality and longevity are your main concerns, investing in a high-quality developer unit is recommended. However, if you prioritize print accuracy and are willing to bear the additional replacement costs, a reliable imaging drum may be the better option.It's important to consult your printer's manufacturer guidelines and consider factors such as print volume, budget, and desired print quality before making a decision. By carefully evaluating your requirements, you can make an informed investment in the component that best suits your business needs.ConclusionThe developer unit and imaging drum are both essential components of a laser printer, each playing a vital role in the printing process. While the developer unit enhances print quality and offers longevity, the imaging drum ensures accurate transfer of toner to paper. Balancing factors such as print quality, lifespan, and cost-effectiveness will help you determine the better investment for your business. By understanding the differences between these components, you can make an informed decision that aligns with your printing needs.Quote InquiryContact us!
READ MORE